We have known about the importance and impact of online marketing for a very long time. Promoting your company via Meta Ads is the first step towards increasing recognition, building brand image and, of course, acquiring customers. However, many first-time marketers start their adventure with Meta Ads by asking: How do I set up a Facebook ad account?
In this article, I will take you through the most important steps you need to take to set up a new advertising account to prepare your first advertising campaign.
How do I set up a fanpage on Facebook?
The first step in setting up an advertising account is to create your own Facebook fanpage. And although this is something you probably already have, we prefer to remind you. The whole process is extremely simple and is described in our guide – How to set up a fanpage step by step?
How do I set up an advertising account on Facebook?
You can set up a Facebook advertising account in Meta’s business space, the so-called Business Manager. Fill in the basic data about your company there and send an application.
Congratulations, you have just created a company account in Business Manager! The first important step is behind you, as your Business Manager account is a company collection, which may include other resources such as an advertising account, fanpage, pixel or product catalogue.
Business Manager has advanced functions that will certainly come in handy when searching for statistics and planning advertising campaigns. I am sure that in no time at all it will become your personal friend for special tasks 😉
However, simply creating an account in the Company Manager is not enough. In order to be able to create your first advertising campaign, you still need to set up an advertising account.
Go to your Company Manager account and then to “Company settings”. Facebook will take you to a place where you can manage your account completely. From the side list, select “Ad accounts”.
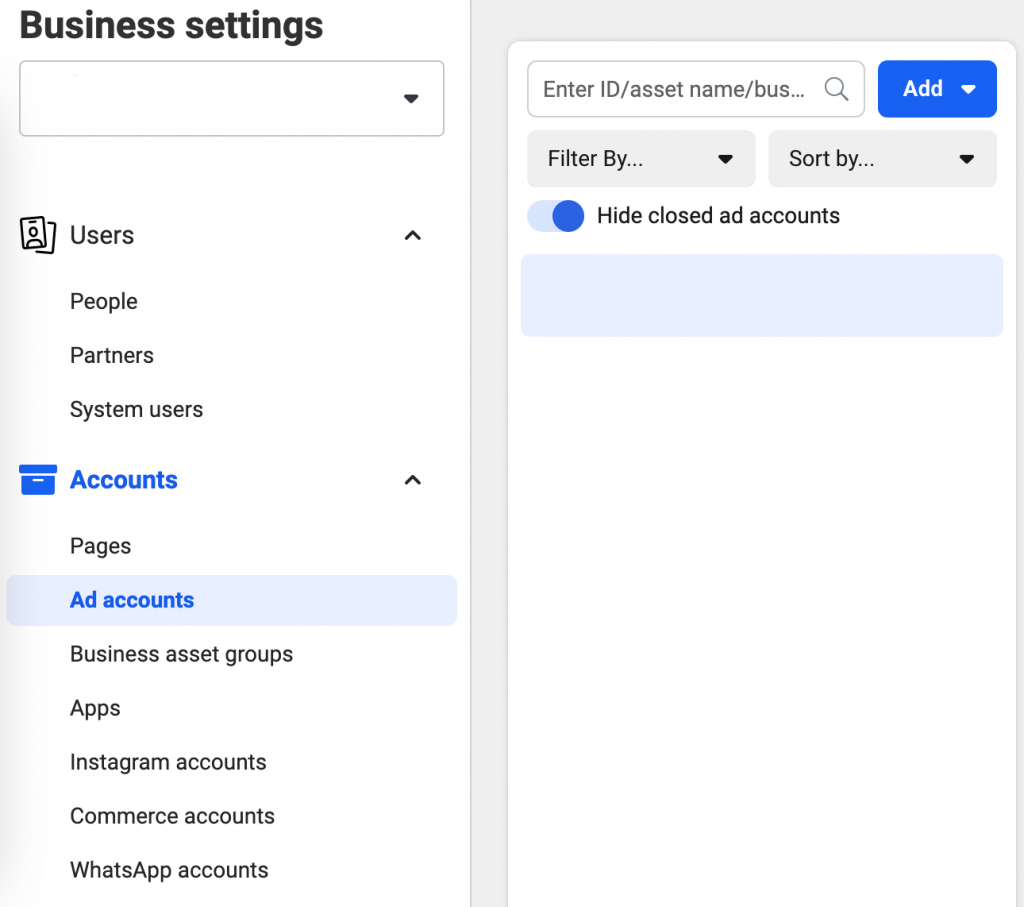
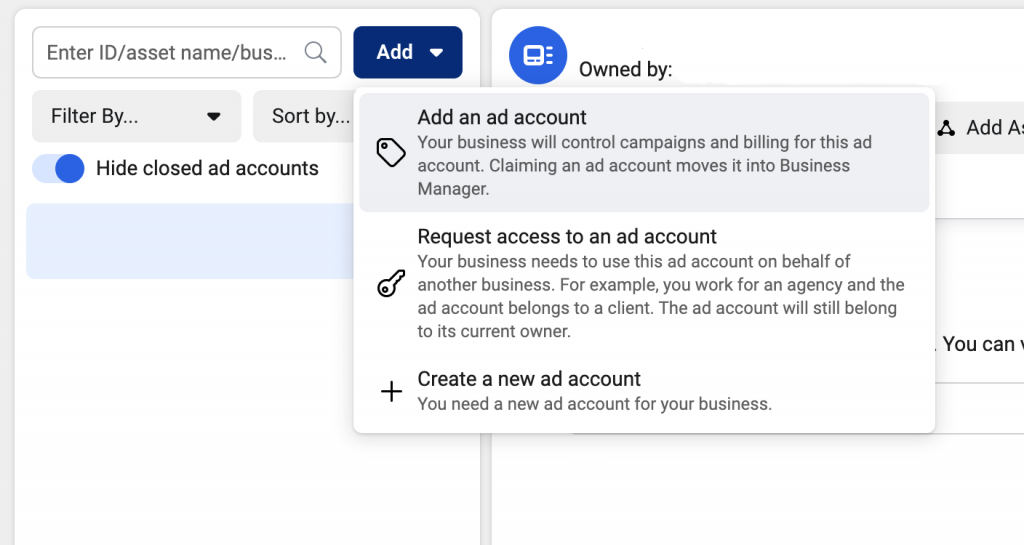
You will be taken to the right place where you set up your Facebook advertising account. Click the blue “Add” button and then “Create a new advertising account”.
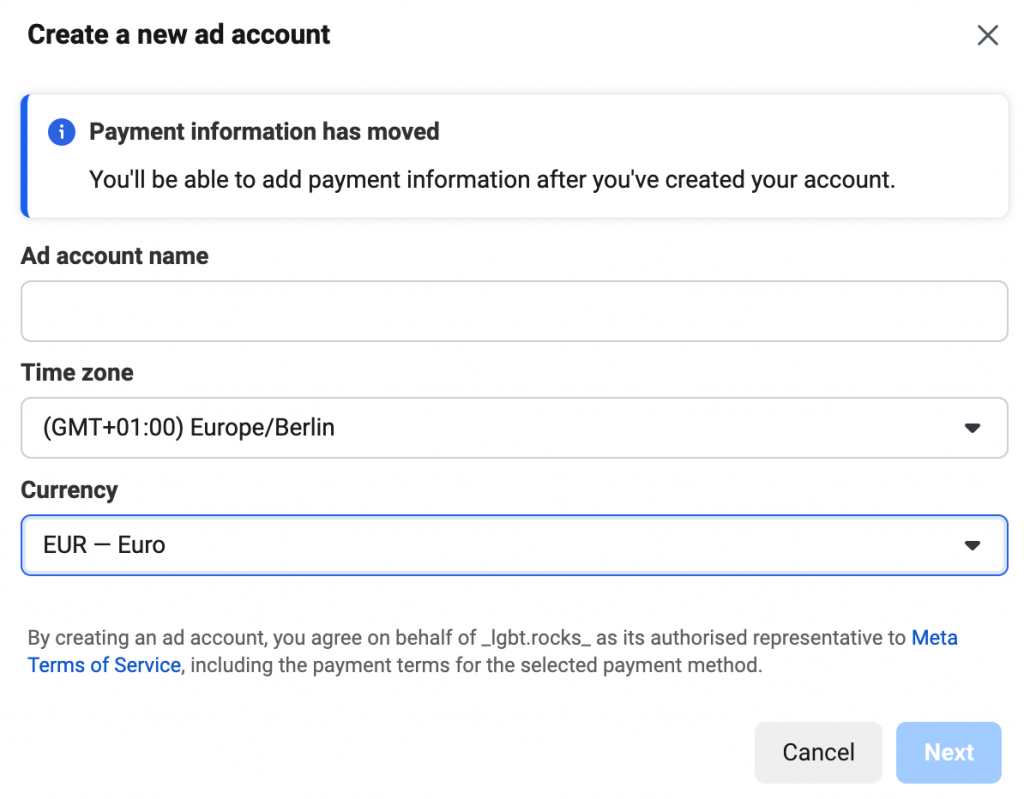
When a new window appears, complete the time zone and currency information, as well as the account name.
IMPORTANT: You must select the correct currency and zone, as you cannot change them later in the settings.
After clicking ‘Next’, you will see further fields to complete. In this step, you need to specify who owns the account. In this case, it is your company, so you select option one.

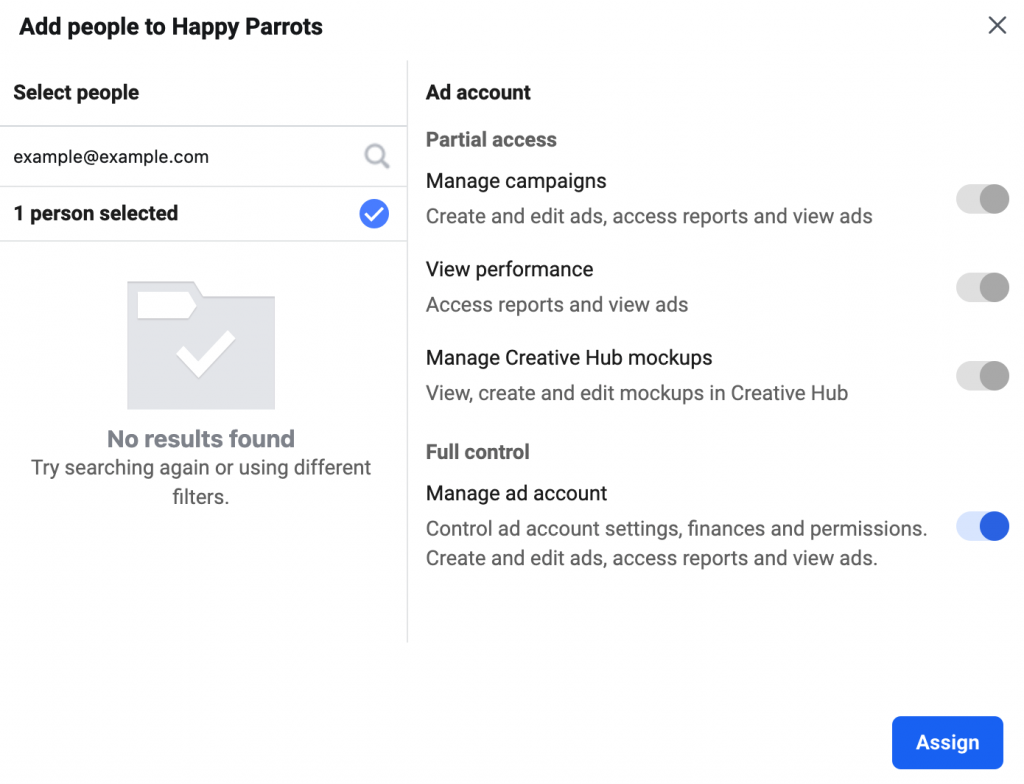
The next step in the account settings is to grant access to the Manager to the relevant people. In this way, they will be able to make changes to advertising campaigns.
If you are the only person who will be operating on this account, be sure to give your personal profile all access – including to manage your advertising account!
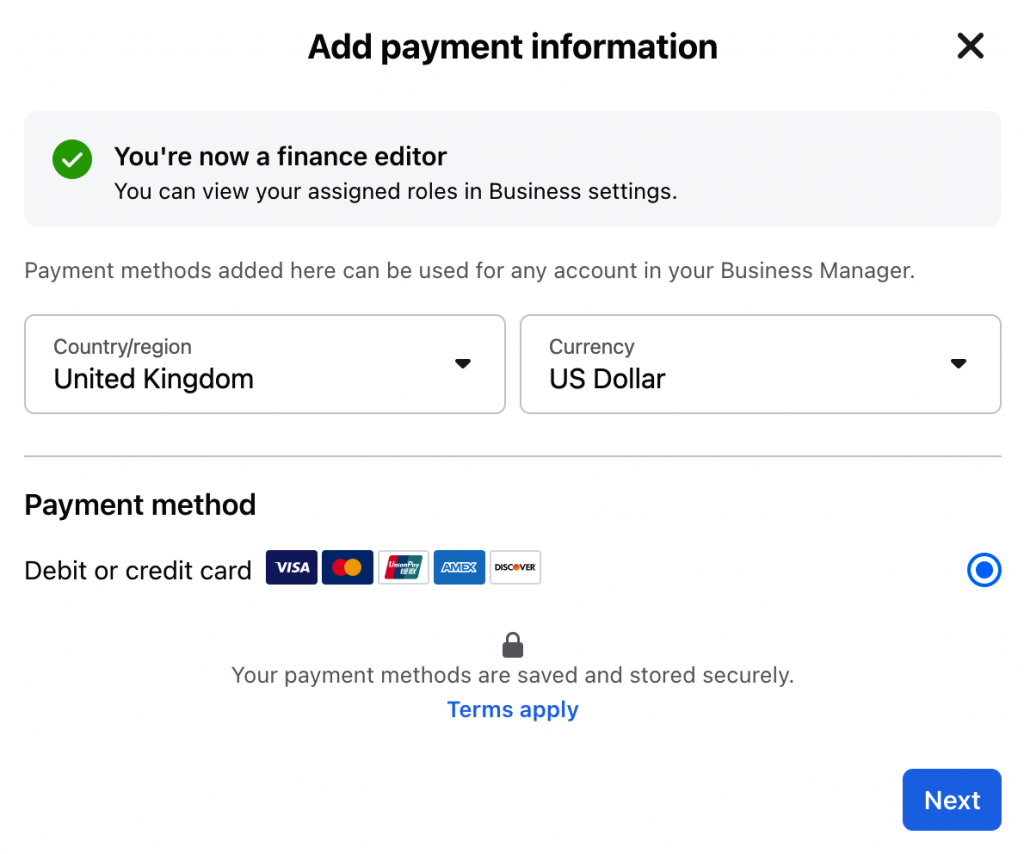
TThe next step, which is mandatory for your advertising account to be fully active, is to add the payment methods in which you pay your ad impression bills.
Once you have created your account and gone through the steps above, you will see a window where Facebook tells you to go to ‘Payment methods’.
You can also do this yourself by going to this section from the navigation on the left or by clicking on this link.
Then complete all the necessary data one by one.
Congratulations! Your Facebook advertising account is ready to go!


